Getting Started with ImageAssist: Setup and Capture Your First Clinical Photos
Tue Mar 10 2026
A quick step-by-step guide to setting up ImageAssist, connecting your EMR, and capturing your first standardized patient photo session.
Getting Started with ImageAssist
A simple guide to capturing standardized clinical photos
Welcome to ImageAssist — the operating system for clinical photography.
This quick guide will walk you through the three simple steps to get started:
- Create your account
- Set up your team and integrations
- Capture your first patient photos
Most practices are fully up and running in less than 10 minutes.
Step 1: Create Your Account
Your ImageAssist administrator account will be created by the ImageAssist team.
To activate your account:
- Go to
https://app.imageassist.com/register - Enter the email address used for your ImageAssist account
- Create your password
Once completed, sign in to the ImageAssist web app.
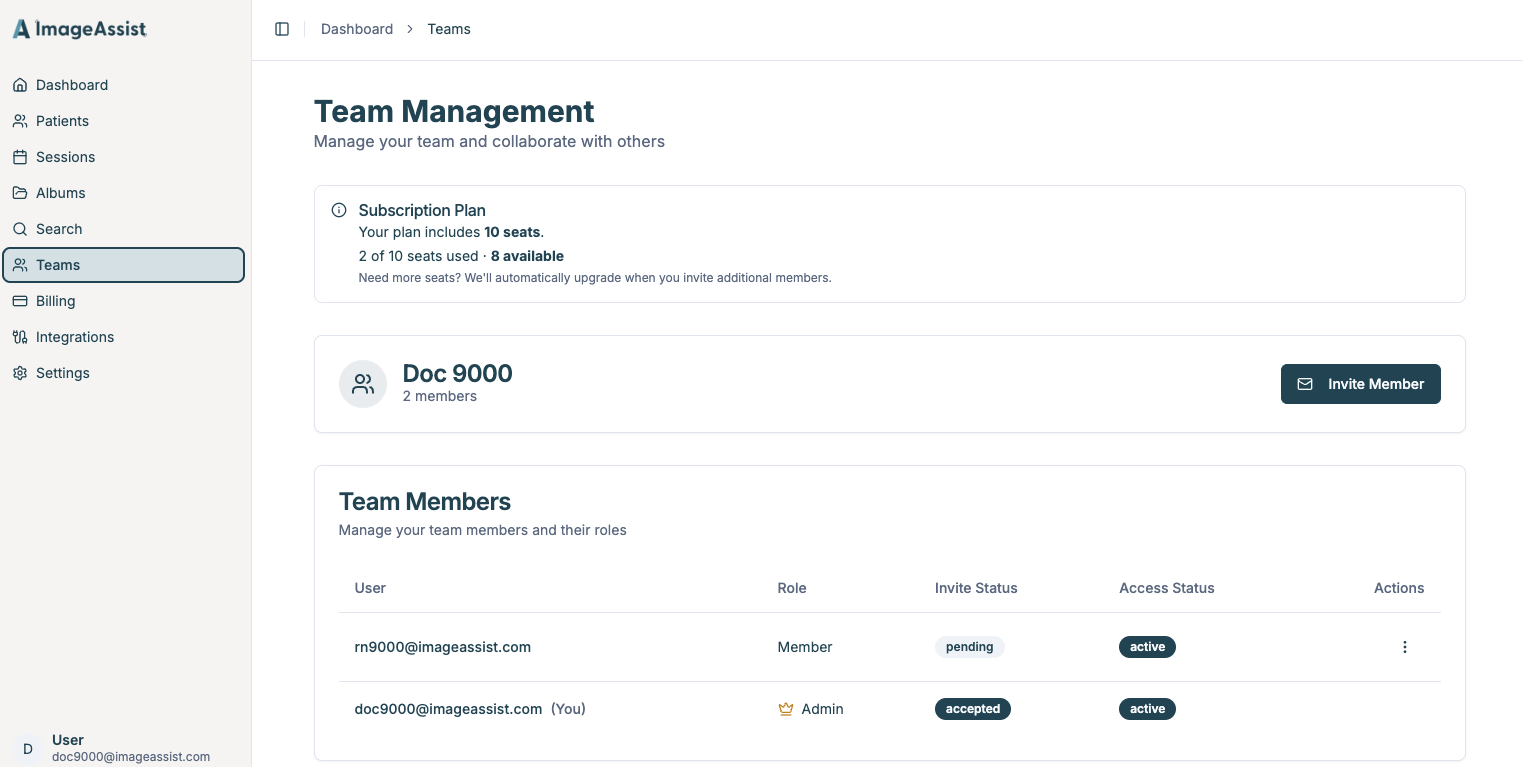
Step 2: Set Up Your Team
After signing in, you can begin the setup process.
In the web app you can:
• Create your team
• Invite providers and staff members
• Manage user access
Team members will receive an email invitation to join your ImageAssist workspace.
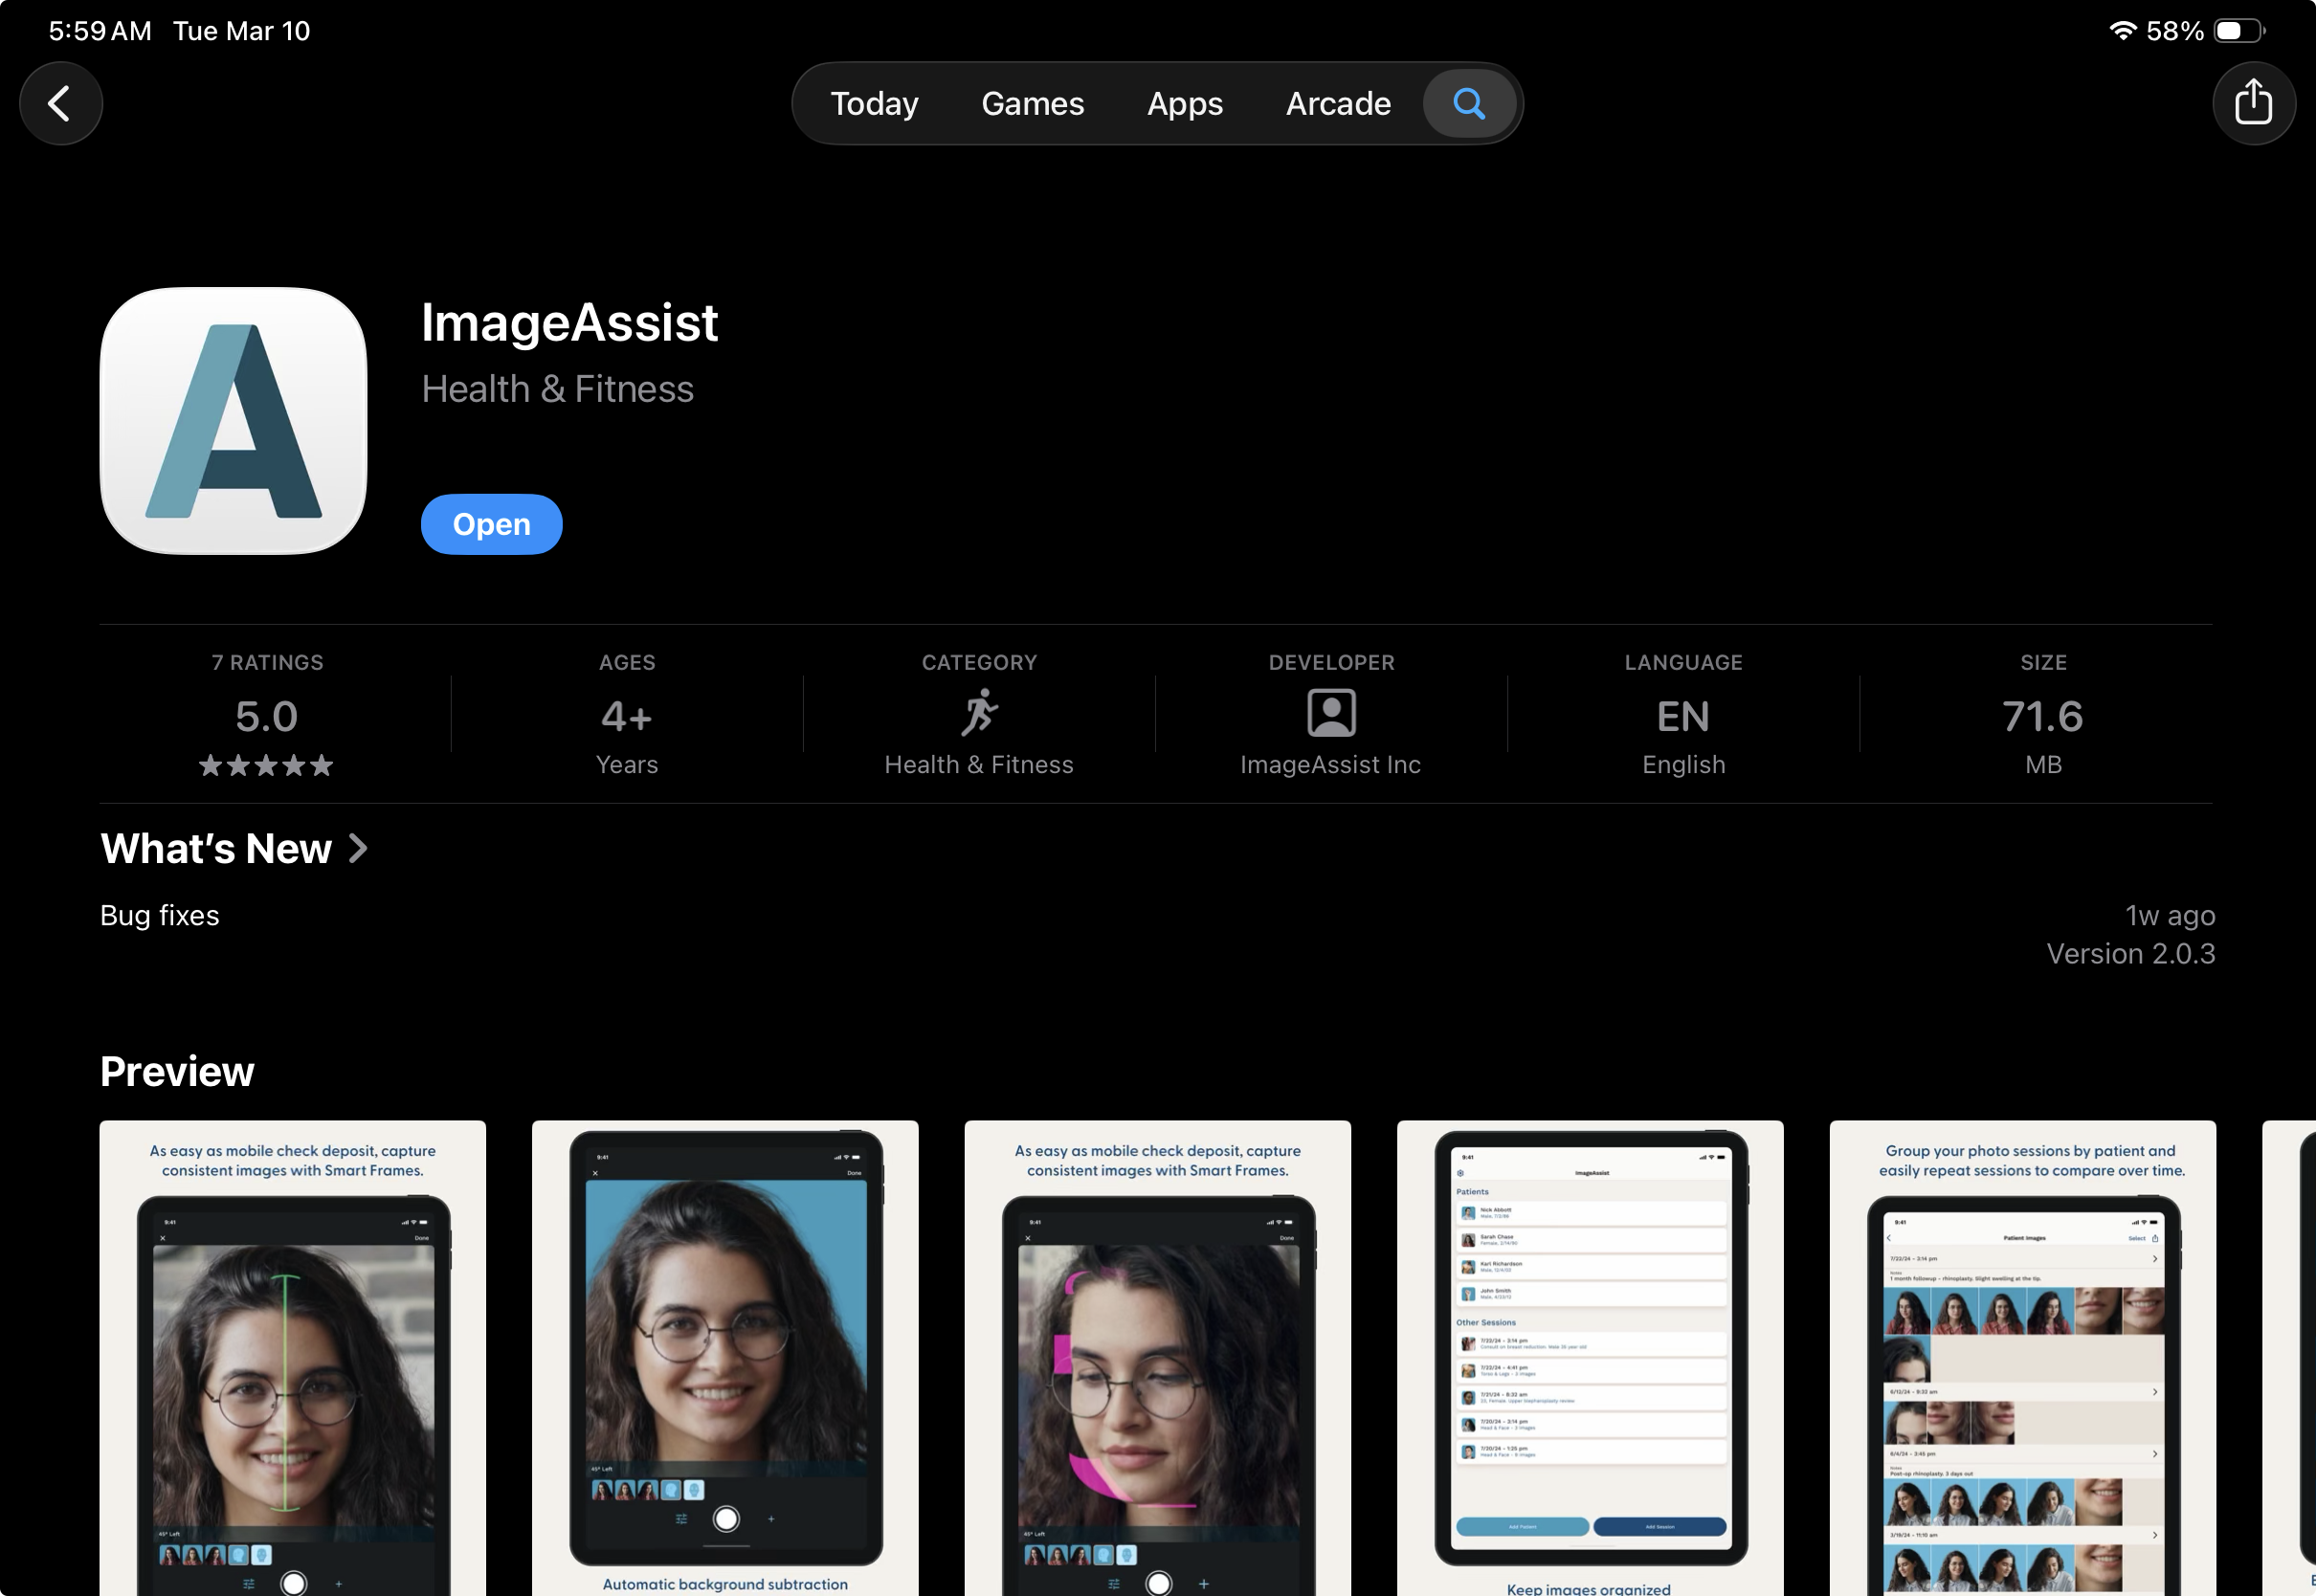
Step 3: Download the ImageAssist iOS App
All photo capture happens on iPhone or iPad using the ImageAssist iOS app.
Download the app from the Apple App Store:
Once installed, sign in using your ImageAssist account credentials.
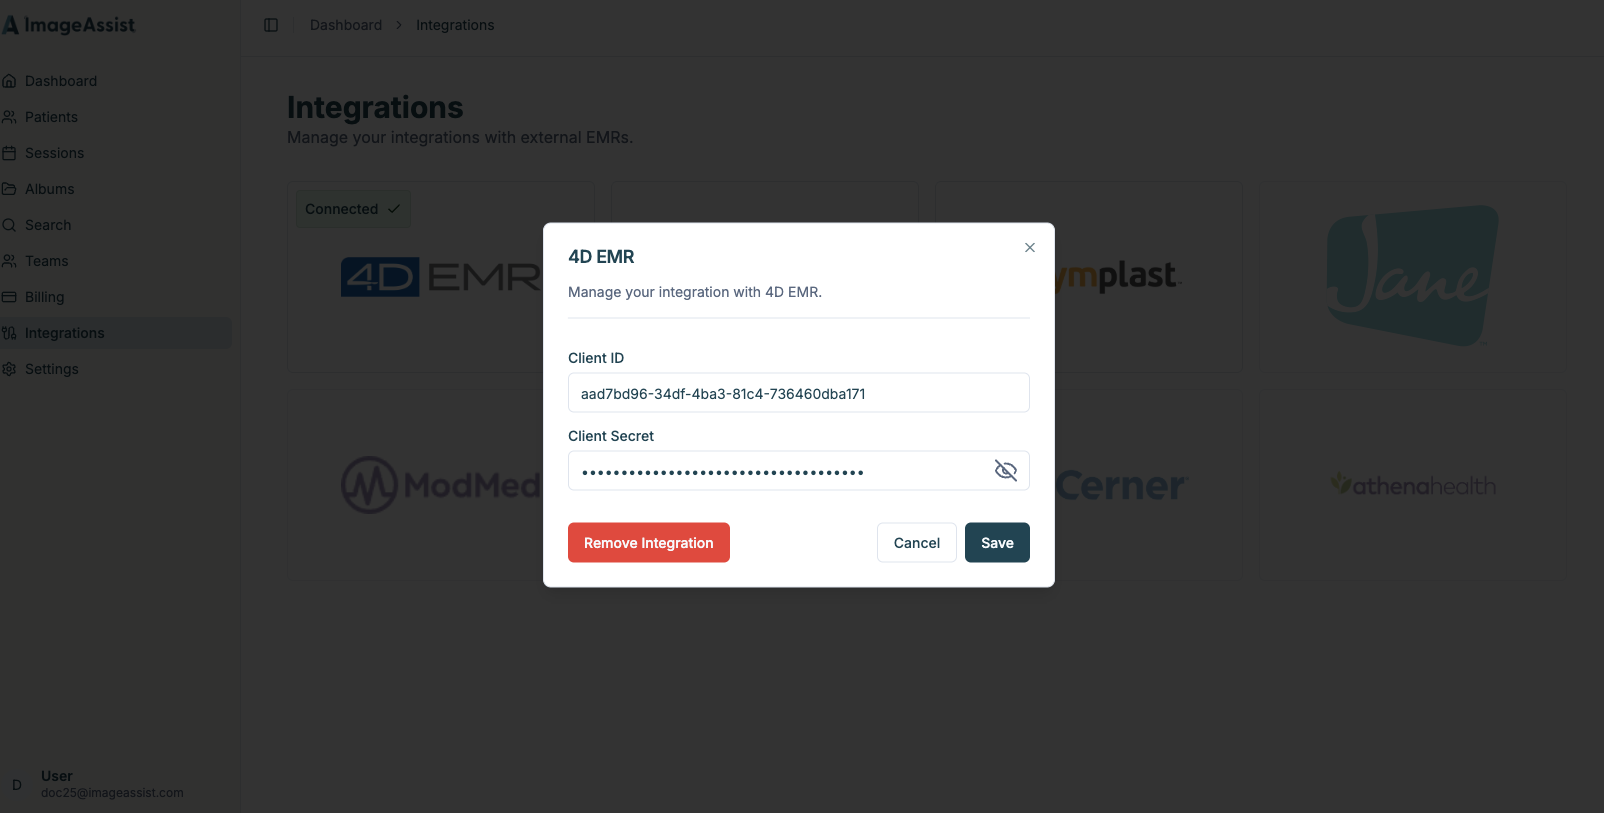
Step 4: Connect Your EMR (Optional)
If your practice uses an EMR integration:
- In the web app, select Integrations from the left navigation
- Enter your EMR credentials
- Click Save
You will see a green checkmark confirming the connection.
When connected, ImageAssist can automatically populate patients from your schedule.
Step 5: Configure Your Capture Preferences
Open the ImageAssist iOS app and tap the Settings gear icon in the top left.
We recommend enabling:
• Biometric login for faster access
• Camera grid for alignment
• Level indicator for consistent angles
• Flash ON for brighter and more consistent photos
These settings help ensure standardized clinical photography.
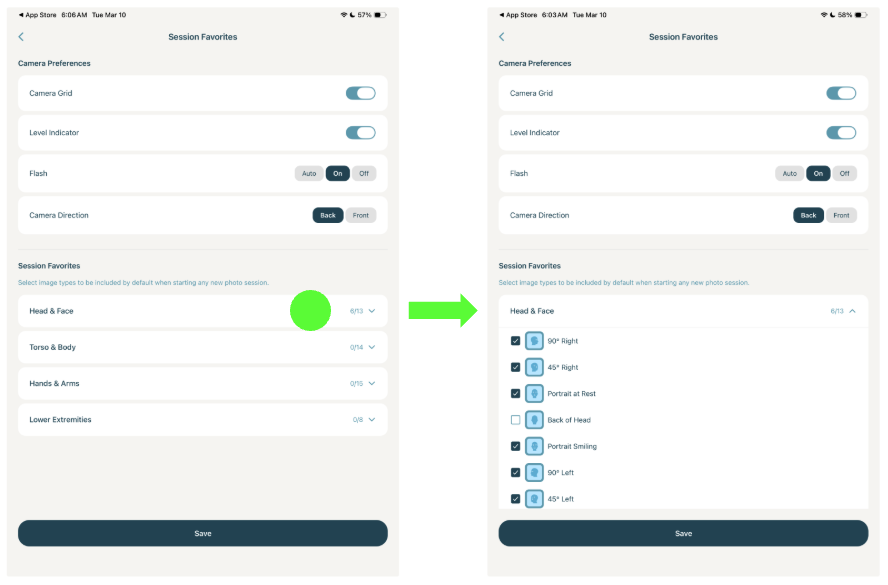
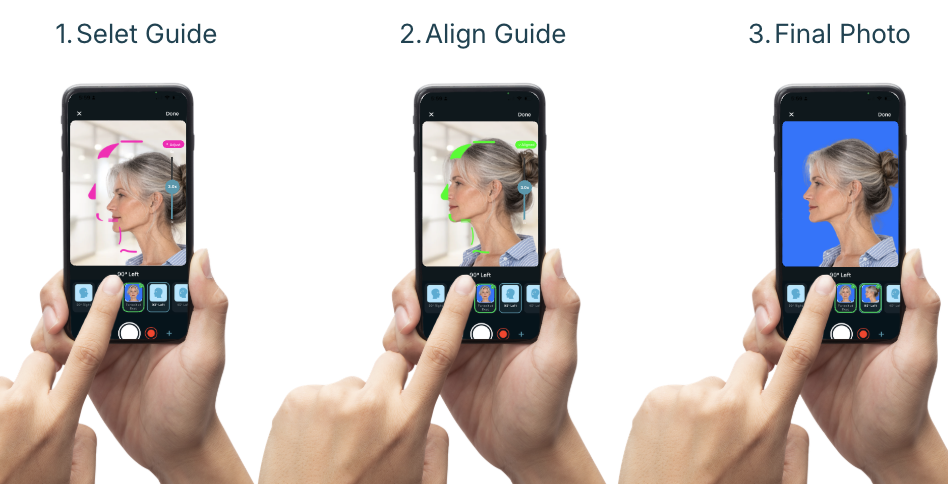
Step 6: Configure SmartGuides
SmartGuides help clinicians capture consistent, standardized clinical photos.
To configure your SmartGuides:
- Open Settings
- Select Preferences
- Choose the SmartGuides you want available for each session
- Tap Save
These guides will appear automatically each time you start a new photo session.
Step 7: Capture Your First Photo Session
Return to the home screen in the iOS app.
If your EMR is connected, you will see patients from today’s schedule automatically populated.
To begin:
- Tap the + button at the bottom of the screen
- Select the patient
- Start capturing photos using your selected SmartGuides
After each photo you can:
• Tap Retake if needed
• Tap Use Photo when satisfied
Step 8: Finish and Save Your Session
When you finish capturing photos:
- Tap Done in the top right corner
- Add optional notes or tags
- Confirm the patient assignment
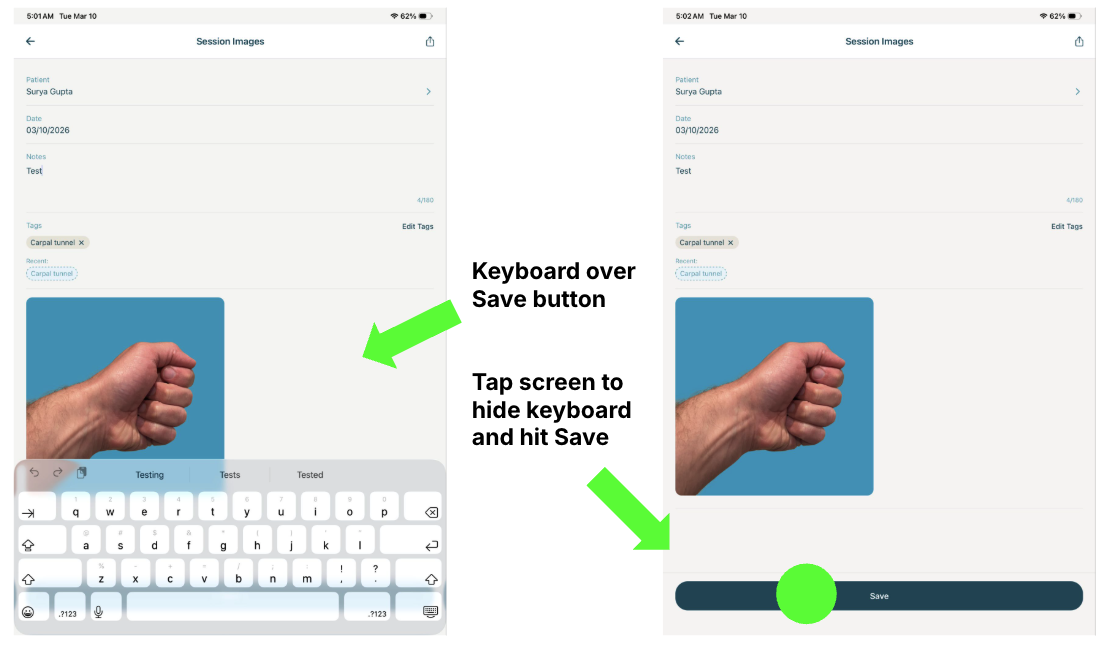
Then scroll down and tap the blue Save button.
⚠️ Important:
The keyboard can sometimes hide the Save button. Be sure to tap Save before exiting the session.
If the session is not saved, the photos will not be stored.
After saving, you will see a success message confirming your session was saved.
Step 9: Accessing Your Photos
Once saved:
• Photos are stored securely in ImageAssist
• If your EMR is connected, the images are also saved to the patient’s EMR record
Your team can view and manage photos from the ImageAssist web viewer or iOS app.
Need Help?
Our team is happy to help you get started and ensure your workflow is optimized.
You can schedule a quick onboarding session here: