
Using ImageAssist with 4D EMR
Mon Aug 25 2025
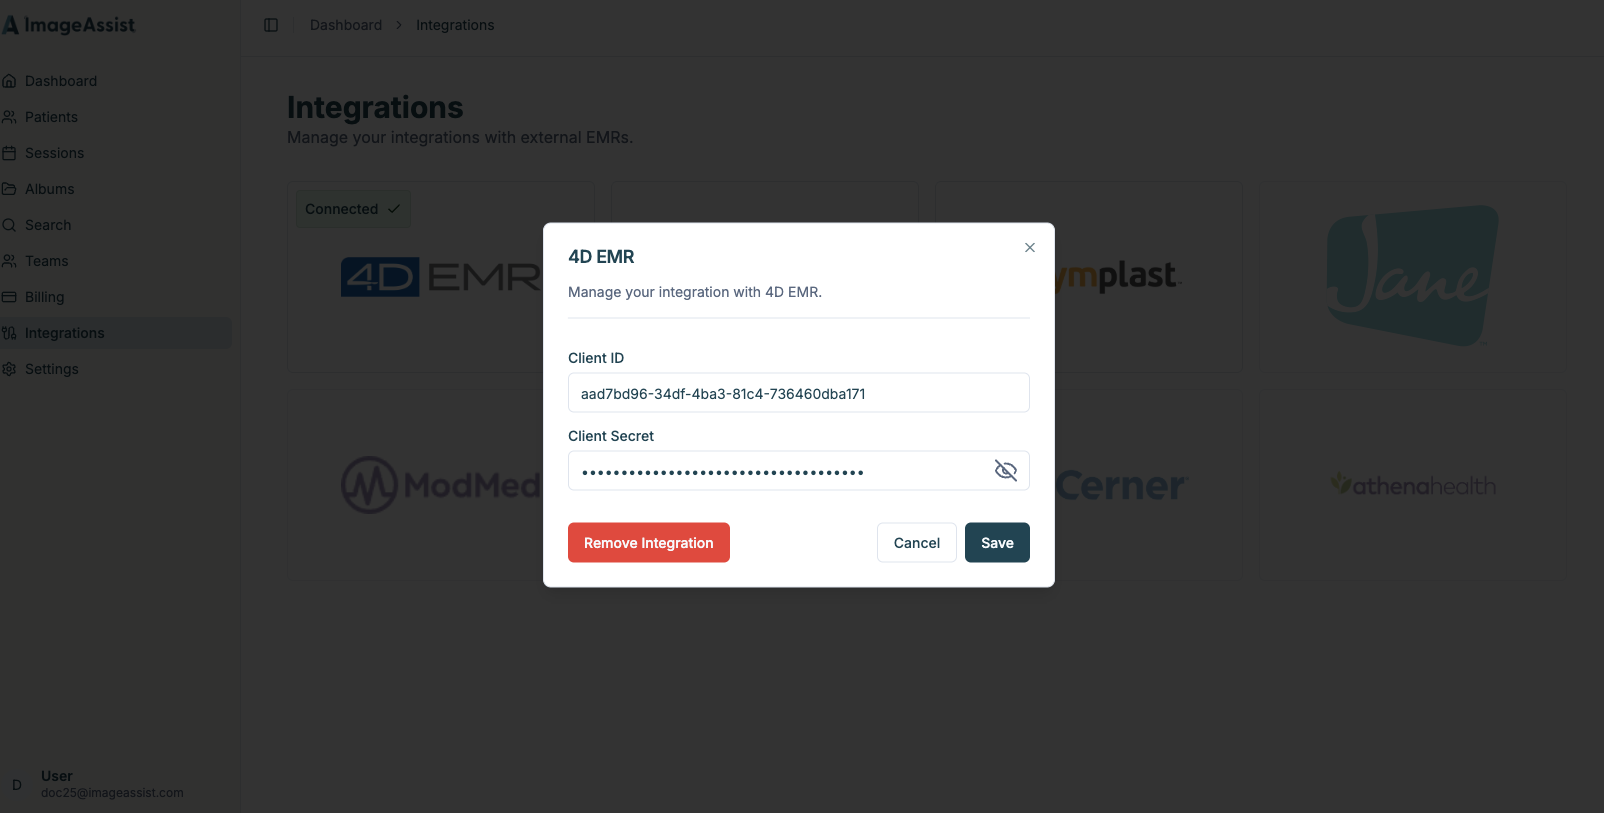
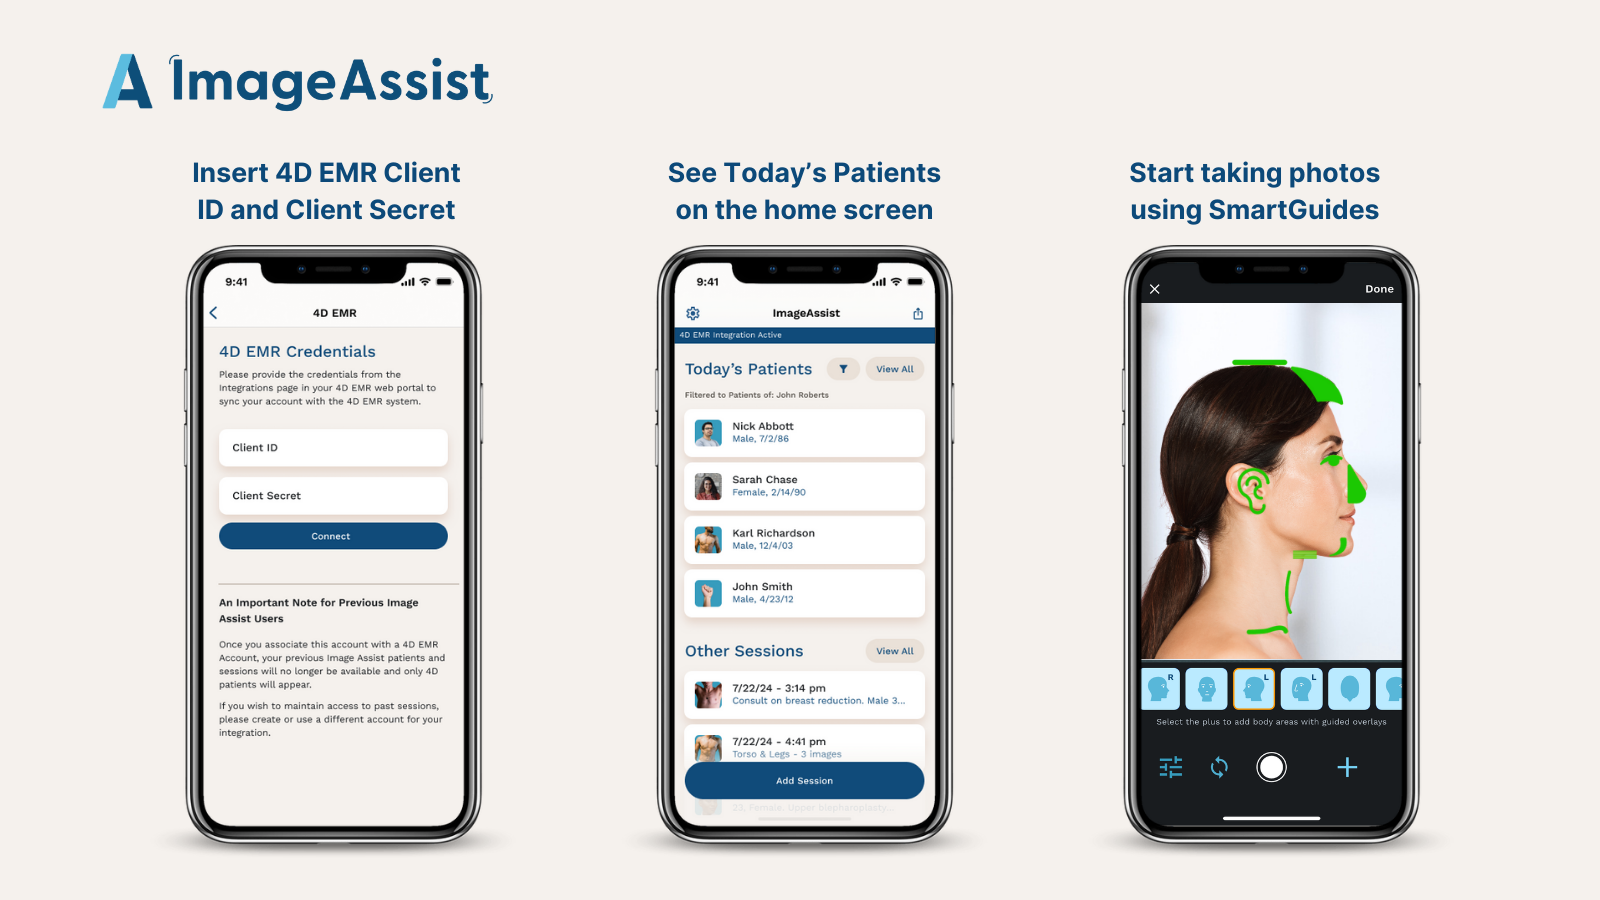
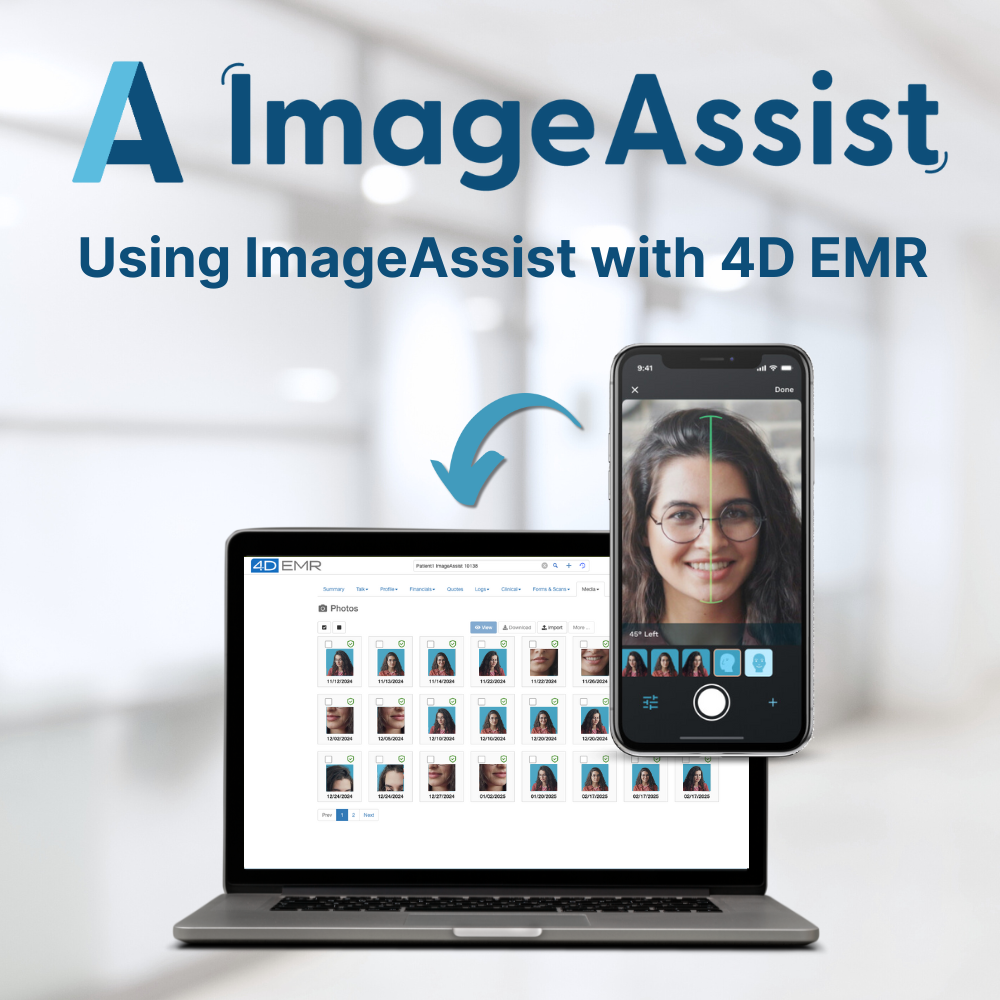
Learn how to seamlessly connect ImageAssist with 4D EMR in just a few steps. This guide walks you through creating your ImageAssist account, enabling the integration, and syncing patient photos directly into 4D EMR’s media section. With no extra API fees, HIPAA-compliant storage, and automatic photo management, you can streamline workflows and focus on patient care.
ImageAssist makes it easy to capture standardized, HIPAA-compliant patient photos and connect them directly into 4D EMR. With our seamless integration, your photos are automatically linked to patient records inside 4D EMR’s media section—no extra API fees or complicated setup required.
Follow the steps below to get started.
Step 1: Create Your ImageAssist Account
- Go to ImageAssist
- Create your account.
- Choose your subscription: Individual or Teams, depending on your practice needs.
Step 2: Enable the Integration
- After subscribing, log back into the ImageAssist app.
- Open Settings.
- Select Integrations from the menu.
Step 3: Connect to 4D EMR
- Enter your Client ID and Client Secret Code (provided by 4D EMR).
- Click Save.
- That’s it — your integration is live!
What Happens Next?
Once connected:
- ImageAssist automatically pulls in Today's Patients for 4D EMR calendar
- Any photos you capture in the ImageAssist app will automatically sync into 4D EMR.
- Images appear under the patient’s record in the Media Section.
- There are no additional API connection fees—it’s included with your subscription.
Why Clinics Love ImageAssist + 4D EMR
- Save Time: Skip manual uploads—photos go straight into the chart.
- Stay Compliant: HIPAA-compliant storage ensures patient privacy.
- Standardize Results: SmartGuides technology delivers consistent before-and-after images.
- Seamless Workflow: No more juggling devices, cloud folders, or unsecured photo rolls.
Start Today
Ready to simplify your clinical photography workflow?
👉
Sign up for ImageAssist and connect it with your 4D EMR account in just minutes.